A Practical Guide to Managing Test Cases in Jira

To effectively manage test cases in Jira, your first actionable step is to move away from native sub-tasks and install a dedicated test management app from the Atlassian Marketplace. This one change provides structured test repositories, clear traceability from requirement to defect, and reporting dashboards that standard Jira can’t offer. It’s how you transform Jira from a task tracker into a QA command center.
Why Your Native Jira Testing Is Holding You Back
If you're currently using Jira sub-tasks or custom labels for test cases, you've felt the pain. It starts with a few tests tacked onto a user story. Soon, you're lost in a tangled web of tickets where tracking progress is manual detective work, and proving a feature is fully tested is a shot in the dark.
This ad-hoc approach simply doesn't scale.
This disorganization has real consequences. Critical bugs slip through because you lack a clear view of test coverage. Release delays become the norm as teams scramble to manually verify what’s been tested.
We've seen teams repurpose user stories for tests and end up with 30-40% more manual rework, slowing down their release cycles by up to two weeks per sprint. This is a direct hit to productivity.
The Limits of Standard Jira
At its core, Jira is a phenomenal issue and project tracker. But it wasn't built for dedicated test management. Forcing it into that role creates immediate, practical roadblocks.
- No Reusability: Test cases created as sub-tasks are trapped. You can't pull them into a regression suite or reuse them in another project without tedious copy-pasting, which introduces errors.
- Poor Visibility: Without a central test repository, there’s no single source of truth. To get an overview of all test suites or the overall health of product quality, you have to manually compile data.
- Broken Traceability: Can you quickly prove that every requirement in a release is covered by a test case? With native Jira, this means exporting data to a spreadsheet and manually connecting the dots—a process that fails audits and wastes time.
This setup forces QA teams into administrative busywork, pulling them away from their primary mission: ensuring a high-quality product. You can start improving your process by reviewing common workflow pitfalls described in https://harmonizepro.com/blog/changing-workflow-in-jira.
The real cost of native Jira testing isn't just wasted time; it's the erosion of confidence. When you can't trust your process, you can't be certain about your product's quality, which leads to release anxiety and customer-facing defects.
Native Jira vs. Dedicated Test Management Apps
To understand the gap, let's compare the capabilities side-by-side. The difference between using sub-tasks and a purpose-built tool is stark.
| Capability | Native Jira (Using Sub-tasks/Labels) | Dedicated Apps (e.g., Nesty, Xray) | Actionable Insight |
|---|---|---|---|
| Test Case Reusability | None. Each test is a one-off sub-task. | Central repository allows reuse across cycles and projects. | Action: Build a regression suite once and reuse it indefinitely, saving hours each sprint. |
| Traceability | Manual and fragile. Relies on linking issues. | Built-in, end-to-end traceability from requirements to defects. | Action: Generate a traceability matrix report in one click to satisfy audit requirements. |
| Reporting & Metrics | Basic issue reports. No QA-specific dashboards. | Advanced dashboards for test coverage, pass/fail rates, and more. | Action: Create a live dashboard to show stakeholders real-time quality metrics. |
| Execution History | Buried in issue comments or requires custom fields. | Detailed, versioned history of every test run. | Action: Pinpoint when a test started failing by comparing execution histories. |
The difference is clear. Dedicated apps introduce a structured, professional workflow that native Jira was never designed to support.
A Path Forward with Dedicated Tools
The solution isn't to ditch Jira—it's to augment it. Dedicated test management apps integrate directly into your Jira instance, adding the necessary structure and features. These tools introduce specialized issue types for test cases, test plans, and test executions, giving everything a proper place.
This fundamental shift brings order to the chaos. Many teams have found success by leveraging a brilliant combination for a perfect bug reporting workflow in Jira to handle the defect side of the equation.
When you layer in smart automation, like the kind Nesty provides, you can build truly intelligent workflows that connect all the pieces. This sets the stage for the practical, step-by-step guidance that follows.
How to Structure Test Cases for Clarity and Reuse
To move past ad-hoc testing, you need a blueprint. Building a solid foundation for managing tests in Jira means creating a structure that brings clarity, encourages reuse, and scales with your team. Your first step is to create a centralized test repository right inside Jira by using a dedicated "Test Case" issue type from a test management app.
This simple move immediately separates your testing artifacts from the development backlog, making them searchable, reportable, and, most importantly, reusable. It's a small change with a massive impact on organization.
Designing the Perfect Test Case Issue Type
A great test case ticket leaves no room for interpretation. It provides all the necessary information so any team member can execute it correctly. Before you build this in Jira, review how to write test cases effectively to master the fundamentals of clarity and reuse.
To standardize everything, configure your "Test Case" issue type to include these key fields:
- Summary: A short, clear title (e.g., "Verify user login with valid credentials").
- Component: The part of the application under test (e.g., Authentication, Checkout, User Profile).
- Preconditions: What must be true before the test starts? (e.g., "User account
testuser@email.commust exist and be active.") - Test Steps: A numbered list of specific actions.
- Expected Results: For each step, the exact, observable outcome that proves it passed.
This structure removes guesswork and drives consistency across your entire QA practice.
Think of a test case as a recipe. A vague recipe gives you inconsistent results. A precise one ensures anyone in the kitchen can create the same dish perfectly, every time. Your Jira test cases need to be that clear.
The Power of Atomic Test Steps
Vague test steps are the number one cause of flaky test results. Instead of "Test the login form," break it down into atomic actions. This makes the test easier to follow and simplifies debugging.
A Poor Example:
- Step 1: Go to the login page and try to log in.
A Much Better Example:
- Action: Navigate to the application's login URL.
Expected Result: The login page loads with fields for username and password. - Action: Enter a valid, registered username into the username field.
Expected Result: The text is accepted by the field. - Action: Enter the corresponding valid password into the password field.
Expected Result: The text is masked and accepted. - Action: Click the "Login" button.
Expected Result: The user is redirected to their account dashboard.
If this test fails on step 4, the developer knows exactly where the process broke, speeding up the fix.
Organizing Tests into Logical Suites
Once you have a library of test cases, you need to group them. This is where test suites (or test sets) come in. These are collections of test cases executed together for a specific purpose. Getting this organization right is crucial for managing test cases in Jira effectively.
Actionable Tip: Use folders or labels within your test management app to create suites like:
- By Feature: All tests for the new "Shopping Cart" feature.
- By Type: A "Full Regression Suite" containing all critical-path tests.
- By Release: A specific set of tests needed to validate the upcoming "v2.1" release.
This doesn't just keep your repository tidy; it makes planning test cycles efficient. A QA lead can simply assign an entire suite to a tester for a given sprint, instead of picking dozens of tests one by one.
This integrated approach pays off. A Forrester study on QA tools found that teams using Jira-native apps achieve 28% higher test coverage rates. They link 92% of requirements to executable tests, a huge leap from the 65% managed in standalone systems. For product managers tracking releases across dev, staging, and production, that’s a game-changer. With a well-structured repository, you're building a foundation for quality that helps you ship more reliable software, faster.
Executing and Tracking Test Cycles with Precision
You’ve built a solid repository of test cases. Now, it’s time to execute and track your test cycles with precision. This is where your Jira setup evolves from a library into a command center for your entire quality assurance operation.
The goal is a clear, repeatable process for running tests against a specific sprint, release, or feature. To do this, group the right test cases into a Test Cycle or Test Run, assign them to QA engineers, and watch the progress unfold in real time. A well-managed cycle in Jira is the antidote to the last-minute chaos many teams dread before a release.
Kicking Off a Test Cycle
A Test Cycle is a specific, targeted mission. For instance, create a cycle named "v2.5 Sprint 3 Regression" or "New User Onboarding Feature." This naming provides immediate context.
Once you have your cycle, pull in the relevant test suites and individual test cases from your repository. Then, assign the whole batch or individual tests to your QA team. This simple act of assigning ownership is critical—everyone knows exactly what they’re responsible for.
Of course, a perfect test case is useless if the environment isn't ready. A test will fail against a broken or outdated build every time. It's crucial to have clear protocols for ensuring the testing environment is stable. For a deeper dive, review these test environment management best practices.
Think of a test cycle like a mission briefing. It defines the objective (what we're testing), assigns roles (who's testing it), and ensures everyone has the right equipment (the correct environment and test data). Without this briefing, teams are just running disconnected drills.
Tracking Execution Status in Real Time
As your testers work, their progress needs to be visible to the entire team—not locked in a spreadsheet. This is where standardized execution statuses are so important. Move beyond vague comments like "it worked" and start marking every test run with a clear, universally understood status.
This immediate feedback loop is a major benefit of managing test cases in Jira. A project manager can glance at a dashboard and instantly understand test cycle progress, see the pass/fail rate, and pinpoint blocked areas.
Essential Test Execution Statuses and Their Meanings
To make real-time tracking work, everyone must use the same statuses. This table breaks down the most common statuses, their meaning, and the next steps for QA and development.
| Status | Definition | Action for QA | Action for Developer |
|---|---|---|---|
| Pass | The actual result matched the expected result perfectly. | Move to the next test case. No further action needed. | None. The functionality works as intended. |
| Fail | The actual result did not match the expected result. | Create a new bug ticket, linking it to this test run. | Investigate the linked bug ticket to identify and fix the issue. |
| Blocked | The test cannot be executed due to an external factor. | Document the blocker (e.g., "Staging environment is down"). | If the blocker is a bug, prioritize a fix. If environmental, coordinate with DevOps. |
| In Progress | The tester has started executing the test but has not finished. | Continue executing the remaining steps. | Monitor for status changes. |
Using these statuses consistently ensures there's no ambiguity. A "Fail" is a clear signal to a developer, while a "Blocked" status tells the team that an external issue needs attention.
Creating an Unbreakable Traceability Chain
The most powerful outcome of this process is an unbreakable chain of evidence. Every action is linked, giving you complete traceability from the initial requirement down to the final test result.
When a test fails, you don't just mark it red. Action: Create a new bug issue directly from the test execution screen. Most dedicated Jira test management apps automate this, pre-populating the bug report with crucial context like the test steps, expected results, and actual results. The tester just needs to add proof—screenshots, videos, or logs.
This new bug is automatically linked to the failed test run, which is linked to the test case, which is linked back to the original user story. This closed-loop system creates a complete audit trail and makes it easy to answer critical questions:
- Which requirements are affected by this bug?
- What tests were run against this user story?
- Has the fix for this bug been verified by QA?
This integrated tracking elevates your team from simply managing tasks to running a sophisticated quality engineering workflow.
Automating QA Handoffs and Quality Gates
You've got your test cycles running. But the real bottleneck is often the manual handoff. A developer moves a ticket to "Ready for Test," but the QA engineer misses the notification. The ticket sits idle for hours or even days.
This is where you move from managing tasks to orchestrating a workflow. By automating handoffs and building quality gates, you can cut out the manual back-and-forth. The goal is a system where the right person is notified at the exact right moment with everything they need.
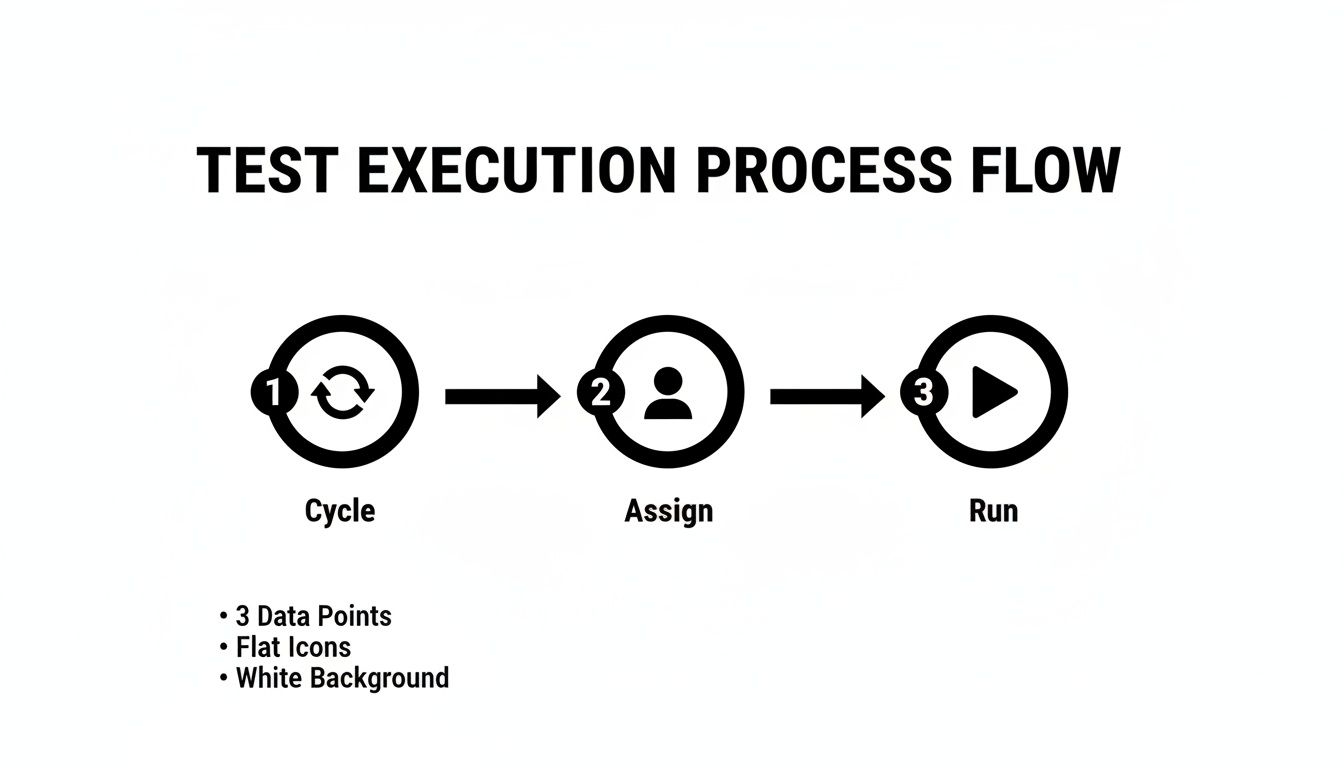
This flow chart breaks down a typical test execution cycle. Automation is what glues these stages together, making the transition seamless.
Building an Automated Handoff from Dev to QA
Here's an actionable automation recipe using a Jira app like Nesty. When a developer drags a user story into the "Ready for Test" column, a chain of actions kicks off automatically.
This is more than just changing the assignee; it's delivering a complete package to the tester.
- The Trigger: An issue transitions to the "Ready for Test" status.
- Assign Instantly: The ticket is immediately reassigned to the QA Lead or a designated tester. No more ambiguity.
- Notify the Team: A message instantly pings a specific Slack channel (e.g.,
#qa-team), tagging the new assignee with a direct link: "@jane.doe – US-123 'User Login Flow' is ready for testing." - Attach the Goods: The workflow can automatically attach the latest build artifacts, ensuring the tester has the right version.
This one automation eradicates missed handoffs and the "is this ready yet?" chatter. It's a fundamental step for how to improve team collaboration in a fast-moving environment.
Enforcing Quality with Automated Gates
A quality gate is a checkpoint—an automated rule that prevents a ticket from moving forward until certain conditions are met. It’s your workflow’s enforcer. One of the most powerful gates prevents a user story from being marked "Done" until every single linked test has passed.
A quality gate acts as your workflow's conscience. It doesn't rely on memory or good intentions; it programmatically enforces the Definition of Done, ensuring quality standards are met every single time, without exception.
Using an app like Nesty, you can build this logic directly into Jira. Here's how:
- Set the Blocker: Put a blocker on the workflow transition to "Done."
- Define the Condition: The blocker stays active as long as any linked test case has a status other than "Pass."
- See the Result: A developer literally cannot close the story. When they try, the system stops them and shows a message like, "Cannot be closed. 3 of 5 linked test cases have not passed."
This creates a powerful, self-regulating loop. The burden of checking test results shifts from a person to an automated rule, guaranteeing that buggy code doesn't slip through.
Building Actionable QA Reports and Dashboards
Great testing is invisible without great reporting. If your hard work is buried in individual tickets, it's not helping anyone. The next step is to turn that raw testing data into live dashboards in Jira that tell a clear story about product quality.
The key ingredient here is Jira Query Language, or JQL. Think of it as a super-powered search bar for Jira. You write simple queries to pull exactly the information you need, and these queries become the engine for your dashboard gadgets.
Mastering JQL for QA Metrics
You don't need to be a developer to master JQL. With a few practical, copy-and-paste examples, you can start filtering for the metrics that matter. These queries are the building blocks for creating visual, useful reports.
Here are a few essential JQL queries for QA teams:
- Overall Test Status for a Release: Finds all test executions for a specific version.
issuetype = "Test Execution" AND fixVersion = "v3.1 Release" - Defects Found in the Current Sprint: Keeps an eye on bug discovery rates.
issuetype = Bug AND sprint in openSprints() - Untested Requirements: A lifesaver for finding coverage gaps. It looks for user stories that don't have linked test cases.
issuetype = Story AND issue not in hasLinkType("Tests")
Getting comfortable with these simple filters is the first step toward turning data into a clear picture.
From JQL Filters to Powerful Dashboard Gadgets
Once you save a JQL query as a filter, plug it into dashboard gadgets to bring the data to life. This allows stakeholders to see the state of quality at a glance.
Actionable Tip: Set up a dedicated QA dashboard with a mix of these three gadgets for a complete view.
- Pie Chart Gadget: Use this for showing test execution status. Plug in your "Overall Test Status" filter to get a simple, color-coded chart showing the percentage of tests that are
Pass,Fail,Blocked, andTo Do. - Filter Results Gadget: Use this to display a live list of critical defects. Create a filter like
issuetype = Bug AND priority = Highestand display it in a table showing the bug summary, assignee, and status. It keeps everyone accountable. - Two-Dimensional Filter Statistics Table: This is fantastic for pinpointing problem areas. Set it up to show
Componentson one axis andStatuson the other, instantly revealing which parts of the application are generating the most bugs.
A dashboard isn't just a report; it's a conversation starter. When a product manager sees a pie chart with a giant red slice for "Failed Tests," it forces an immediate and necessary discussion about release readiness.
This visibility is a major benefit of managing test cases inside Jira with a purpose-built tool. Real-world stats show that integrated systems can slash testing overhead by 35%. That efficiency helps scrum teams ship 22% faster while maintaining 95% traceability—critical for regulated industries. You can find more details in these findings on integrated QA solutions.
By creating these dashboards, you give the entire team the context to make smarter, data-driven decisions, understand risks, and ultimately, ship with more confidence.
Frequently Asked Questions About Jira Test Management
Even with a perfect system, practical questions always come up. Teams often ask how to handle tricky situations like running the same tests across multiple environments or managing a large regression suite.
Here are answers to the most common questions with battle-tested advice.
How Should We Handle Tests for Different Environments?
You have one test case but need to run it against dev, staging, and UAT. Do not duplicate the test case. This creates a maintenance nightmare.
The best practice is to reuse the same test case but execute it within different Test Cycles. Create a distinct cycle for each environment and pull in the same set of test cases.
- Cycle 1: "v4.2 Staging Smoke Test"
- Cycle 2: "v4.2 UAT Full Regression"
This keeps your test library clean and follows the DRY (Don't Repeat Yourself) principle. The execution history for staging is tracked in its own cycle, separate from UAT, but the test case itself lives in one central spot.
What Is the Best Way to Manage a Large Regression Suite?
As your product grows, your regression suite will too. Running hundreds of tests every sprint is unrealistic.
The key is to prioritize and categorize your suite. Stop thinking of it as one monolithic block. Actionable Tip: Break down regression tests into smaller, targeted sub-suites using labels or components in Jira.
- P1 – Smoke Tests: A small set of mission-critical tests. Run these on every build to catch catastrophic failures immediately.
- P2 – Core Functionality: A larger suite covering the most important features. Run this once per sprint to ensure main workflows are solid.
- P3 – Full Regression: The entire suite. Save this for right before a major release.
This tiered approach maximizes risk coverage without killing your team's velocity.
How Do We Integrate Automated Tests with Jira?
Getting automated test results into Jira is the final piece of the puzzle. Most modern test automation frameworks can communicate with Jira test management apps via plugins or APIs.
The goal is to have your automated test runs appear in Jira just like manual ones. A typical workflow involves a CI/CD pipeline job that finishes and automatically creates a new Test Cycle in Jira. It then populates that cycle with the test results, marking each as Pass or Fail and attaching logs or screenshots.
The real magic of managing tests in Jira happens when you bring everything together. When your manual test results, automated run data, and all the linked defects live in one place, you get a complete, 360-degree view of product quality. No spreadsheet or standalone tool can come close to that.
The industry has caught on. Data from the Atlassian Marketplace shows test management apps account for 15% of all Jira plugin installs in enterprise companies. This is especially true in the US and Europe, where agile teams now make up 65% of all software projects. You can discover more insights about these Jira trends and see how other teams are centralizing their QA work.
Turn your complex Jira processes into self-managing workflows with Harmonize Pro. Our app, Nesty, helps you automate handoffs, enforce quality gates, and build dynamic checklists that keep your teams aligned and your projects on track. Transform your Jira workflows with Nesty today.