A Practical Guide for Admins on Changing a Workflow in Jira
Your Jira workflow is the digital backbone of how your team completes work. Changing it is a strategic move that can either unlock new efficiency or create chaos. Before touching any admin settings, you must be crystal clear on why a change is necessary. Are you trying to eliminate a bottleneck, adapt to a new methodology, or provide clearer reporting to stakeholders? A vague reason leads to a failed implementation.
Knowing When to Change Your Jira Workflow
Before editing, confirm the workflow is the true problem, not a symptom of a deeper issue like insufficient resources or unclear requirements. A well-timed update can boost team velocity. A poorly planned one creates confusion and kills momentum.
Common Triggers for a Workflow Update
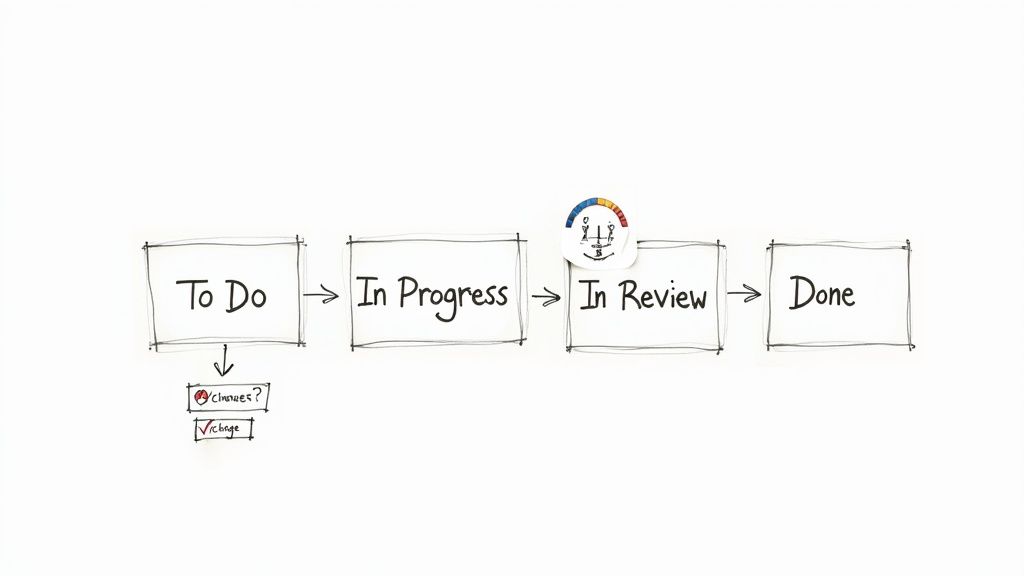
Often, the need for a change is obvious. A growing software team, for example, quickly outgrows a simple "To Do -> In Progress -> Done" workflow. To accurately reflect their development cycle, they need more granular stages like "Backlog," "In Development," "Code Review," "QA Testing," and "Ready for Release." Conversely, an overly complex workflow with redundant statuses can slow teams down. If your team spends more time debating an issue's status than working on it, it's time to simplify.
Here are actionable signs that your Jira workflow needs an overhaul:
- Frequent Bottlenecks: Identify columns where tickets consistently pile up. This signals a process blockage or a resource constraint that a workflow change can help visualize and manage.
- Poor Visibility: If stakeholders constantly ask for manual status updates, your workflow statuses are too vague or don't reflect the actual work stages. The workflow should provide clarity at a glance.
- Direct Team Feedback: Listen to your users. If they find the workflow clunky or misaligned with their actual process, treat their feedback as a requirement for change.
- Shift in Methodology: When moving from Scrum to Kanban or adopting a new agile framework, your Jira workflow must be updated to support the new principles, ceremonies, and required metrics.
A great workflow should be an invisible guide, not an obstacle. When your team starts developing workarounds to avoid the workflow, it has failed and must be fixed.
To ensure your changes are effective, benchmark your current process against proven strategies. Brushing up on Jira workflow best practices provides a solid foundation for designing a workflow that sets your team up for success.
Your Pre-Change Preparation Checklist
Attempting a live Jira workflow change without a plan is a high-risk gamble that almost always causes disruption. The smoothest updates are built on careful preparation. Follow this checklist before you modify any settings.
Your first action is to secure buy-in from your team, product owners, and other key stakeholders. Schedule a meeting to walk them through the proposed changes and explain why each modification is necessary. Connect each change directly to a specific problem they are currently facing to get them on board.
Visualize the Change and Get Everyone on the Same Page
To make the discussion concrete, map out the current and proposed workflows side-by-side on a whiteboard or a digital tool like Miro. Draw every status and transition clearly. This visual comparison makes it easy for stakeholders to understand the changes, ask specific questions, and spot potential issues you might have overlooked.
Remember, Jira is a critical tool for a vast number of teams. An estimated 57.5% of professional developers use it to manage their work. Any change has a significant ripple effect, making stakeholder alignment an essential prerequisite for success. You can see the complete data in the full Stack Overflow survey analysis.
Once you have alignment, the next step is to create a safe testing environment.
Set Up a Sandbox Environment
This cannot be stressed enough: Never test workflow changes in your live production environment. A sandbox is non-negotiable. If you use Jira Cloud Premium or Enterprise, Atlassian provides a sandbox where you can clone your production setup.
Use this isolated environment to perform these critical validation steps:
- Test every transition path: Click through each new transition to verify that all conditions, validators, and post-functions execute as expected.
- Check for integration conflicts: Confirm that the new workflow does not break any connected apps, custom scripts, or automation rules.
- Conduct user acceptance testing (UAT): Grant access to team leads or power users so they can run through common scenarios and provide feedback in a zero-risk environment.
Treat your sandbox as a full dress rehearsal. It is where you find and fix all issues before the live rollout, ensuring a smooth and predictable deployment.
Finally, prepare a rollback plan. Document the exact steps required to revert to the old workflow, including how to switch the workflow scheme and manage any issues that were in transition. Having this plan ready gives you the confidence to proceed, knowing you can quickly undo the change if a critical problem arises.
A Practical Guide to Editing Workflows
With preparation complete and your sandbox ready, it's time to implement the changes. Modifying a Jira workflow involves configuring the logic that dictates how issues move through your process.
Navigate to the Jira administration panel to begin. Your first step should always be to make an inactive copy of the current workflow. This allows you to make all your changes without impacting the live project. You will activate this new version only when it is fully configured and tested.
Building Your Workflow's Foundation: Statuses and Transitions
Statuses are the core stages of your process, such as ‘To Do’, ‘In Review’, or ‘Done’. Adding or removing a status is straightforward. The real power lies in configuring transitions, which are the pathways connecting one status to another. Each transition you create becomes a clickable button in the Jira issue view. Give it a clear, action-oriented name like "Submit for Review" to make the process intuitive for your users.
Think of statuses as rooms and transitions as doorways. Your job as an admin is to control not just where the doors lead, but who has the key and what criteria they must meet to pass through.
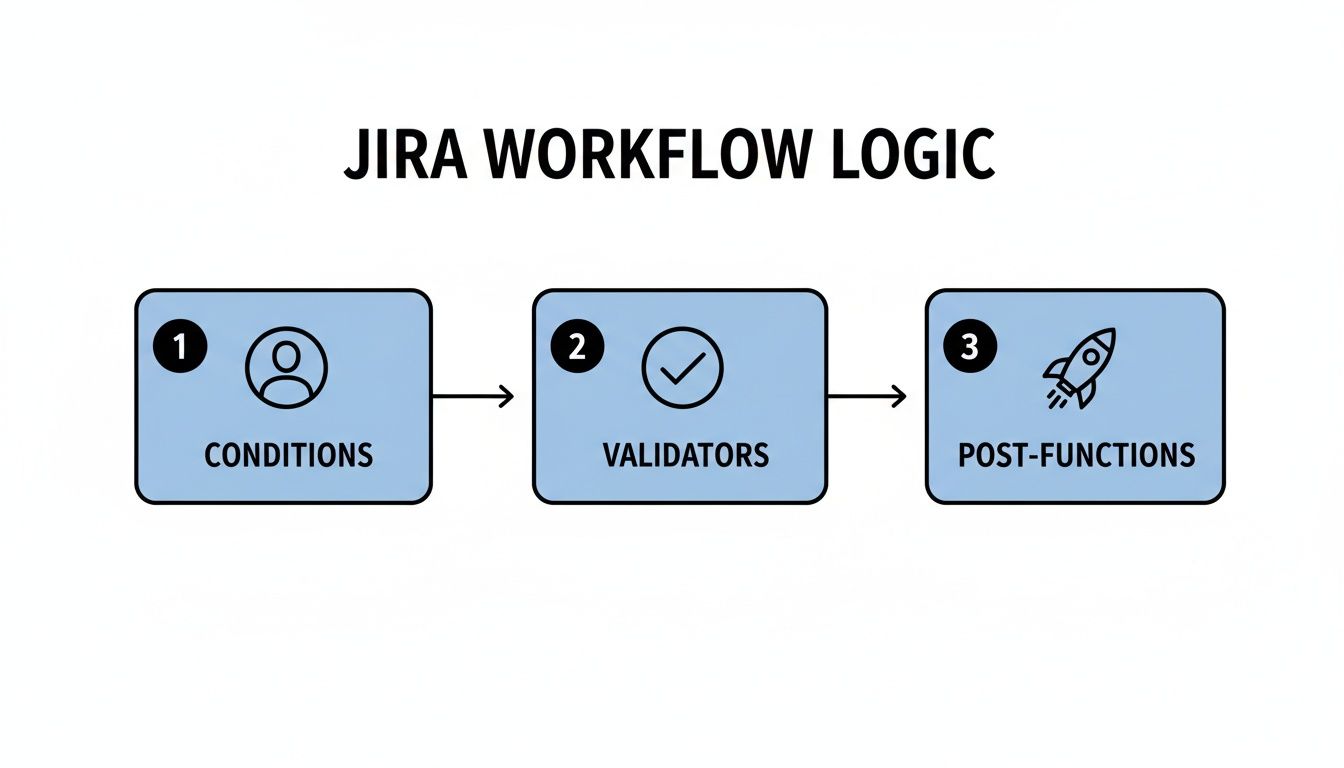
To build an intelligent workflow, you must master the three components that control each transition: conditions, validators, and post-functions.
Adding Intelligence with Conditions, Validators, and Post-Functions
These three tools transform a simple process map into a smart, automated system that enforces rules and eliminates repetitive tasks.
- Conditions control who can see a transition. For example, set a condition so only users in the 'QA-Team' project role can see the "Mark as Tested" transition, preventing others from skipping this crucial step.
- Validators act as quality gates, checking that specific criteria are met before allowing a transition. A common use is adding a validator to the "Start Progress" transition that requires an assignee to be set, preventing unassigned work.
- Post-Functions trigger actions after a transition is completed successfully. This is your primary tool for automation. A classic post-function is to automatically assign an issue to the QA lead as soon as it moves to the ‘Ready for Testing’ status.
Here is a practical example for a software team that wants to enforce peer review for every bug fix:
To configure the transition from ‘In Progress’ to ‘In Review’:
- Condition: Add a condition so only the issue's current assignee can move it to review, preventing premature handoffs.
- Validator: Add a validator that checks if a 'Code Reviewer' custom field has been filled out. The transition will fail if the field is empty.
- Post-Function: Once the validator passes, a post-function automatically assigns the issue to the user selected in the 'Code Reviewer' field and sends them a notification.
By layering these three elements, you build a system that actively guides your team toward your established best practices.
Key Workflow Components and Their Functions
Use this table as a quick reference for the function of each workflow component.
| Component | Function | Practical Example |
|---|---|---|
| Conditions | Controls who can perform a transition. | Only a ‘Project Manager’ can move an issue to the ‘Approved’ status. |
| Validators | Ensures required data is present before a transition. | A bug report can’t move to ‘In Progress’ until the ‘Steps to Reproduce’ field is filled. |
| Post-Functions | Automates actions after a transition is complete. | When an issue moves to ‘Done’, automatically update its resolution to ‘Fixed’. |
Mastering these tools will enable you to make precise, effective workflow changes that reduce process friction and genuinely help your team.
How to Safely Migrate Issues to a New Workflow
After designing and testing your new workflow in the sandbox, the final step is migrating all existing issues. With a clear plan, this is a low-risk process. The goal is to move every active issue to the new workflow without data loss or team disruption.
The migration process is initiated by associating your new workflow with the project's workflow scheme. Jira will then prompt you to map the statuses from the old workflow to the new one. This mapping step is critical for data integrity.
Mapping Old Statuses to New Ones
For each status in your old workflow, you must select a corresponding status in the new one. For example, an old status like ‘In QA’ can be mapped directly to a new status called ‘QA Testing’.
However, you will likely encounter edge cases, such as obsolete statuses like ‘On Hold’ that don't exist in the new workflow. Here are two practical strategies for handling them:
- Map to a logical default: Route issues from the obsolete status to a default state in the new workflow, such as the ‘Backlog’. This allows product managers to re-triage them.
- Use a temporary holding status: Create a temporary status in the new workflow, like ‘Needs Triage’. Map the old status there. After migration, you can use a bulk change operation to move these issues to their correct new statuses.
The golden rule of migration: no issue left behind. You must map every old status, even those you believe are unused. Overlooking a single status can leave issues in a broken state, creating a post-migration cleanup task you want to avoid.
The status mapping process preserves the logic built into your transitions.
This sequence of Conditions, Validators, and Post-Functions is what makes your workflow intelligent. Correct status mapping ensures this logic remains intact after the switch.
Communicating and Scheduling the Migration
The technical migration may be quick, but the impact on your team is immediate. Proactive communication is essential. Announce a specific migration window well in advance, choosing off-peak hours (like a Friday afternoon) to minimize disruption. Inform your team about any potential downtime and clearly explain what changes they will see when they log back in. This simple step prevents a flood of support requests and ensures a smooth transition for everyone.
For organizations managing complex dependencies across multiple teams, refer to this guide on cross-functional workflow transitions to keep everyone aligned.
Automating Handoffs to Shave Off Manual Work

An optimized Jira workflow should actively move work forward. Once your statuses and transitions are defined, the next major improvement is automating the handoffs between teams. These are the points where work often stalls while waiting for someone to manually update a ticket, reassign it, and notify the next person.
Instead of relying on manual updates, use automation to handle these repetitive tasks for you. Jira Automation, based on a simple "if-this-then-that" logic, is the primary tool for this. You define a trigger (like a status change) and then specify the actions Jira should perform automatically.
Starting with Jira's Native Automation
Consider the common handoff from development to QA. Manually, a developer must move the issue, select the correct QA engineer, reassign the ticket, and potentially send a Slack message. This multi-step process is prone to error.
With Jira Automation, you can execute this entire sequence with a single transition:
- Trigger: Issue transitions to "Ready for QA."
- Action 1: Automatically assign the ticket to a specific QA lead or use a load-balancing rule to assign it to the next available tester.
- Action 2: Add a comment to the issue, tagging the QA team's user group for visibility.
- Action 3: Send a notification to a designated Slack channel like #qa-alerts.
This transforms your workflow from a passive tracker into an active participant. The data from Atlassian shows that over 10 billion automated actions have been executed, proving the value teams get from offloading manual work.
Enforcing Standards and Complex Handoffs
Jira's native automation is excellent for straightforward tasks, but what about enforcing complex standards like a Definition of Done (DoD)? For example, you may need to prevent a story from being moved to "Done" until all its sub-tasks are closed and a "QA Approved" checkbox is ticked.
Automation enforces process discipline without requiring manual oversight. By building your standards directly into the workflow, best practices become non-negotiable steps in the process.
For these advanced requirements, you may need a Marketplace app like Nesty for Jira (Harmonize Pro). It allows you to create detailed, multi-step checklists within an issue and use their completion as a trigger for workflow transitions. For example, you can build a rule that only allows an issue to be reassigned to the DevOps team after the QA checklist is 100% complete, eliminating coordination overhead and ensuring nothing moves forward prematurely.
For more advanced techniques, explore our complete guide to Jira workflow automation.
How to Validate and Scale Your New Workflow
Launching your new workflow is the start, not the end, of the process. Treat your workflow as a living system that requires ongoing validation, refinement, and scaling.
Your immediate priority is to gather feedback from your users. Schedule a brief retrospective meeting one or two weeks after launch to capture their initial impressions. Ask targeted questions to uncover specific friction points:
- Which transitions are confusing or feel unnecessary?
- Are any statuses unclear or redundant?
- Is the new workflow saving time, or has it added extra clicks?
Acting on this feedback demonstrates that you value your team's experience and helps you resolve minor issues before they become major problems.
Planning for Organizational Growth
A workflow that is perfect for a small team can become a bottleneck as your organization grows. You must plan strategically for how to scale your Jira workflows. A common challenge is deciding between a single, shared workflow scheme for multiple projects and project-specific workflows.
A shared workflow promotes consistency across similar teams, simplifies cross-project reporting, and makes it easier for people to move between projects. However, it risks becoming a "one-size-fits-none" solution if teams have genuinely different processes.
A workflow should be a supportive framework, not a rigid cage. The moment a standardized process actively hinders a team's ability to deliver value, it’s time to consider a more tailored, project-specific approach.
A project-specific workflow, on the other hand, gives a team complete autonomy to tailor its process. The trade-off is increased administrative overhead and the potential for inconsistent data that complicates high-level reporting.
Atlassian is addressing this challenge by increasing Jira Cloud's capacity to 100,000 users on a single instance, enabling large organizations to centralize work and reduce workflow fragmentation. You can read more about these Jira scalability enhancements on their blog.
The key is to evolve your workflows with intention. Continuously monitor performance, maintain open communication with your teams, and be prepared to adapt as your organization's needs change.
Ready to eliminate manual handoffs and enforce your Definition of Done without the extra work? Harmonize Pro's Nesty app turns your Jira tickets into dynamic, automated processes. Discover how Nesty can streamline your cross-team collaboration.