10 Actionable Jira Workflow Best Practices for 2025

Jira is the backbone of modern software development, but are you using it to its full potential? A well-designed workflow is the difference between a simple to-do list and an automated, intelligent system that accelerates delivery and enforces quality. Many teams struggle with chaotic boards, missed handoffs, and unclear processes, turning Jira into a source of friction rather than a tool for collaboration. This common pitfall leads to manual overhead, inconsistent data, and a lack of visibility into the true status of work. When workflows are poorly configured, they become a bottleneck instead of a guide.
This guide cuts through the noise. We will explore 10 specific, actionable Jira workflow best practices that go beyond generic advice. You'll learn how to implement clear states, enforce quality gates like Definition of Done (DoD) or Definition of Ready (DoR), automate tedious manual steps, and leverage metrics to create a self-managing process. These strategies are tailored for the unique needs of software, QA, DevOps, and product teams, providing concrete steps to build a more efficient and predictable delivery pipeline.
By implementing these best practices, you can transform your Jira instance from a passive task tracker into an active, intelligent system. The goal is to build workflows that enforce standards, reduce rework, and let your teams focus on what they do best: building great products. Forget the vague tips; this listicle provides practical implementation details and real-world examples to help you create a workflow that truly works for your organization.
1. Define Clear Workflow States and Transitions
The foundation of any effective Jira project is a workflow that accurately maps to your team's real-world processes. One of the most critical Jira workflow best practices is to establish a well-defined set of states (statuses) and the explicit transition rules that govern movement between them. This creates a predictable, transparent process map that eliminates ambiguity and ensures everyone understands how work progresses from conception to completion.
A clear workflow prevents issues from getting lost, clarifies ownership at each stage, and provides accurate data for reporting on cycle time and throughput. Without it, your Jira board becomes a chaotic free-for-all where issue statuses are inconsistent and team members are unsure of the next step.
How to Implement This Practice
Start by mapping your current process on a whiteboard. Don't build your ideal workflow yet; document what actually happens. This exercise often reveals hidden steps or bottlenecks. From there, you can design a streamlined workflow in Jira.
- For Scrum Teams: Implement a workflow like
Backlog→Selected for Development→In Progress→Code Review→In QA→Done. This structure clearly separates development, review, and testing activities. - For Kanban/Ops Teams: Use a simpler flow focused on continuous delivery:
New→Assigned→In Progress→Waiting for Customer→Resolved→Closed. This accommodates the reactive nature of operations and support tasks.
Key Insight: The goal isn't to create the most complex workflow, but the most intuitive one. Start with 4-6 core states. You can always add more complexity later, but it's much harder to simplify an overly engineered process that the team has already adopted.
Actionable Tips for Success
- Visualize and Document: Use Jira’s workflow designer to build and visualize your process. Create a Confluence page that details the purpose of each state and the "Definition of Done" required to move to the next.
- Restrict Transitions: Configure your workflow to enforce the process. For example, prevent an issue from moving from
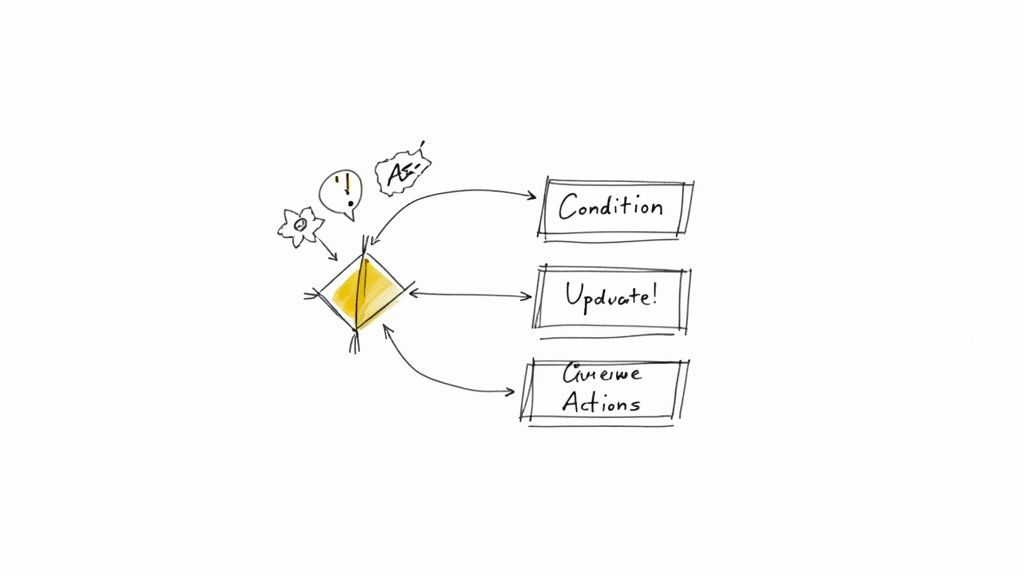
In Progressdirectly toDone, forcing it to go throughCode ReviewandIn QAfirst. - Use Conditions and Validators: Add workflow conditions (e.g., only the 'Assignee' can move an issue to
In Progress) and validators (e.g., require a 'Test Plan' to be attached before moving toIn QA) to enforce quality gates. - Review and Refine: Treat your workflow as a living document. Hold a review every quarter to gather team feedback and identify bottlenecks. Are issues piling up in one particular state? That’s a signal that your process needs adjustment.
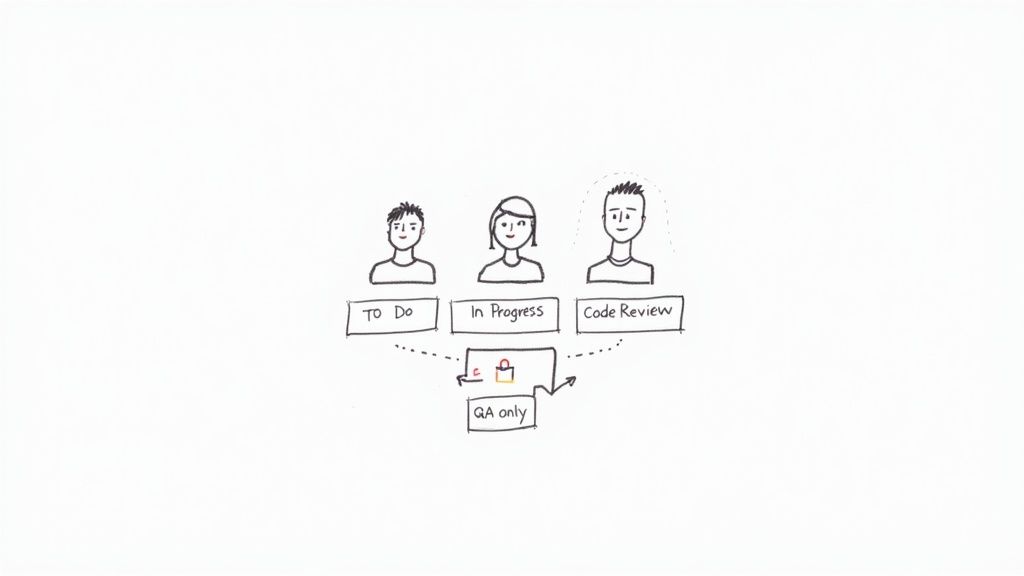
2. Implement Role-Based Permissions and Workflow Restrictions
Once you have a clear workflow, the next step is to ensure it’s followed correctly by controlling who can do what, and when. A crucial Jira workflow best practice is to implement role-based permissions and configure workflow restrictions. This practice prevents unauthorized or premature state changes, creating clear lines of accountability and safeguarding the integrity of your process.
Without defined permissions, anyone can move an issue anywhere, bypassing critical quality gates like code reviews or QA testing. This leads to inconsistent data, missed steps, and a breakdown in process discipline. By restricting transitions, you ensure that specific actions are performed only by the individuals qualified and responsible for them.
How to Implement This Practice
Begin by identifying the key handoff points and quality gates in your workflow where control is most needed. Map these points to specific project roles (e.g., Developer, QA Engineer, Release Manager) within Jira. Then, configure your workflow to use conditions that restrict transitions based on these roles or user groups.
- For Development Teams: Restrict the transition from
In ProgresstoCode Reviewto only the issue's assignee. Then, allow only users in the 'Senior Developers' project role to move an issue fromCode ReviewtoIn QA. - For Release Management: Configure the workflow so that only a user in the 'Release Manager' group can execute the final transition from
Staging ApprovedtoDeployed to Production. This prevents accidental or unauthorized deployments.
Key Insight: The goal of restrictions isn't to create bureaucracy, but to build guardrails that guide the team toward the correct process. These permissions should empower roles by clarifying their specific responsibilities within the workflow, not hinder them.
Actionable Tips for Success
- Map Roles to Jira Groups: Create Jira groups that correspond to team roles (e.g.,
qa-team,dev-leads,product-owners) and use these in your workflow conditions for easier management. - Use Conditional Transitions: In the workflow editor, add a "Condition" to a transition. A common one is the "User Is In Project Role" or "User Is In Group" condition to lock down specific paths.
- Document the "Why": On your Confluence workflow documentation page, clearly state who can perform each transition and the reasoning behind the restriction. This fosters understanding and buy-in from the team.
- Audit Permissions Regularly: Use Jira's Permission Helper and Scheme Reports to periodically review who has access to what. This helps identify and clean up misconfigurations before they cause problems. For more advanced automated controls, you can explore tools that help enforce critical workflow gates.
3. Use Custom Fields to Enhance Workflow Context
While workflow states and transitions define the path of an issue, custom fields provide the crucial context needed at each step. One of the most impactful Jira workflow best practices is to use custom fields strategically to capture essential information at specific stages. This enriches your issues with data that informs decision-making, streamlines handoffs, and improves the overall intelligence of your workflow.
Without relevant context, team members are forced to hunt for information in comments, attachments, or external documents. By embedding data collection directly into your workflow, you ensure that the right information is available at the right time, reducing friction and preventing delays caused by missing details.
How to Implement This Practice
The key is to present fields only when they are needed. Don't overwhelm users with dozens of fields on the "Create Issue" screen. Instead, use Jira screens and workflow transitions to conditionally require or display fields as an issue progresses. This approach makes your workflow dynamic and user-friendly.
- For Bug Triage: In a bug-fixing workflow, the initial screen might only require a summary and description. Upon transitioning to
In Progress, you could then prompt the developer to fill in required fields likeRoot Cause AnalysisandAffected Component(s). - For Feature Development: A new feature request might only need a
Business Justificationto move from theBacklogtoSelected for Development. Later, when it moves toReady for Release, aDeployment Notesfield could be required. - For DevOps/Release: A deployment ticket could require a
Target Environmentfield when moving toReady for Deployment, and aRollback Planfield before transitioning toDeploying.
Key Insight: Think of your workflow as a conversation with your team. Custom fields are the questions you ask at each stage to ensure clarity and completeness. Ask only what's necessary for the next step, not everything at once.
Actionable Tips for Success
- Use Transition Screens: Configure your workflow transitions to pop up a screen that prompts users for specific information. For example, when moving an issue to a
Blockedstatus, present a screen that requires aReason for Blockertext field. - Leverage Field Configurations: Create different Field Configuration Schemes for different issue types. This allows you to show or hide fields based on the workflow state, keeping issue screens clean and relevant.
- Group Related Fields: On your Jira screens, use tabs to group related custom fields together (e.g., a "QA" tab with fields for
Test PlanandTest Results). This improves readability and organization. - Regularly Audit Fields: Custom field clutter is a common Jira problem. Every six months, run an audit to identify and deprecate unused or redundant fields. This keeps your instance performant and your processes lean.
4. Establish Workflow Automation Rules
Manually updating issues, assigning them to the right person, and sending status notifications is not only tedious but also a major source of process errors and delays. Establishing workflow automation rules is one of the most impactful Jira workflow best practices because it offloads repetitive administrative tasks to the system itself. This ensures consistency, reduces human error, and frees up your team to focus on value-adding work instead of Jira housekeeping.
A well-automated workflow enforces your process 24/7 without fail. It accelerates handoffs between teams, keeps stakeholders informed in real-time, and ensures that critical process steps are never missed. This practice transforms your Jira instance from a passive task tracker into an active, intelligent process engine.
How to Implement This Practice
Jira Automation uses a simple "When… If… Then…" logic to build rules. You define a trigger (When), add optional conditions (If), and specify the resulting action (Then). Start by identifying high-volume, low-complexity tasks that are currently performed manually. These are the perfect candidates for your first automation rules.
- For Development Teams: Create a rule to automatically transition an issue from
BacklogtoIn Progresswhen a developer assigns it to themselves. Set up another rule that, when a pull request is created, automatically moves the linked Jira issue toCode Review. - For Service/Support Teams: When a customer comments on an issue in the
Waiting for Customerstatus, create a rule to automatically transition it back toIn Progressand assign it to the last agent who worked on it. If an issue remains inResolvedfor 5 days without a customer response, automatically transition it toClosed.
Key Insight: The true power of automation is not just saving clicks, but enforcing process discipline. By automating transitions and notifications, you ensure that every issue follows the exact same path, leading to more reliable data and predictable outcomes.
Actionable Tips for Success
- Start Simple and Iterate: Begin with basic rules like auto-assigning sub-tasks when a parent issue is created. As you gain confidence, build more complex rules with multiple conditions and actions.
- Keep Stakeholders Informed: Set up automation to send notifications to a Slack or Microsoft Teams channel when high-priority issues are created or when a release is deployed. You can learn more about how to configure advanced notifications with Nesty triggers on harmonizepro.com.
- Manage Time-Based SLAs: Create rules that trigger reminders or escalate issues that are approaching an SLA breach. For example, automatically comment on and change the priority of a bug that has been in the
Newstatus for more than 24 hours. - Document and Monitor: Maintain a Confluence page that documents every automation rule, its purpose, and its trigger. Regularly check the audit log for your automation rules to ensure they are running as expected and not causing unintended side effects.
5. Implement Status Categories for Cross-Project Consistency
As organizations scale, teams often create custom workflows tailored to their specific needs. While this autonomy is powerful, it can lead to reporting chaos when every project has unique status names like "In Review," "Ready for QA," or "Testing." One of the most impactful Jira workflow best practices for maintaining high-level consistency is to leverage Jira’s built-in Status Categories: To Do, In Progress, and Done.
These categories act as a universal translator, grouping disparate custom statuses under a standardized umbrella. This allows for meaningful cross-project reporting and portfolio management without forcing every team into a single, rigid workflow. You can accurately track the overall progress of an epic or initiative even if the underlying teams use different statuses.
How to Implement This Practice
The implementation lies in thoughtfully mapping your custom workflow statuses to one of the three core categories. This mapping is done within the Jira administration settings when you create or edit statuses. The goal is to create a logical grouping that reflects the nature of the work at each stage.
- To Do (Blue): Map any state where work has not yet begun. This includes statuses like
Backlog,New,To Do,Selected for Development, orReady for Triage. - In Progress (Yellow): Map all states where work is actively being performed or is in a waiting state between active steps. This is where you would map statuses like
In Progress,Code Review,In QA,Blocked, orWaiting for UAT. - Done (Green): Map all statuses that signify the completion of work on an issue. Common statuses include
Done,Resolved,Closed,Released, orCancelled.
Key Insight: Status categories are the key to unlocking meaningful portfolio-level metrics. They provide a common language for reporting that allows leadership to understand overall progress without getting lost in the weeds of each team's specific workflow terminology.
Actionable Tips for Success
- Create a Status Mapping Guide: Document your organization's standard for mapping statuses to categories in a Confluence page. This ensures consistency as new projects and workflows are created.
- Use Categories in Gadgets and Dashboards: Configure Jira gadgets like the "Issue Statistics" or "Two-Dimensional Filter Statistics" to report based on Status Category. This provides a clean, high-level view for stakeholders.
- Leverage Categories in JQL: Use JQL queries like
statusCategory = "In Progress"to build filters, boards, and reports that span multiple projects, regardless of their specific workflow statuses. - Review Categorization Regularly: During quarterly process reviews, audit your statuses to ensure they are still mapped to the most appropriate category. As workflows evolve, these mappings may need adjustment.
6. Create Workflow Screens and Field Configurations Per Transition
A cluttered Jira screen is a major source of friction and poor data quality. One of the most impactful Jira workflow best practices is to tailor which fields are visible and required at each step of your process. By creating specific screens for transitions, you guide users to provide the right information at the right time, reducing cognitive load and ensuring critical data is captured before an issue moves to the next stage.
This practice transforms your workflow from a static data-entry form into a dynamic, context-aware system. When a developer moves an issue to "Code Review," they are prompted only for the necessary review information, not irrelevant fields from the initial issue creation. This keeps the process clean, efficient, and focused on the task at hand.
How to Implement This Practice
Jira allows you to associate a unique screen with a workflow transition. This screen can display a completely different set of fields than the standard "Create" or "Edit" screens. Use this feature to implement progressive disclosure, revealing information as it becomes relevant.
- For Bug Triage: On the
Createscreen, show onlySummary,Description,Priority, andAffected Version. When a QA engineer transitions the bug toReady for Development, a transition screen could appear requiring them to addStory PointsandEpic Link. - For Release Management: A release ticket might start with just a
SummaryandTarget Release Date. When transitioning toIn Staging, a screen prompts forStaging Deployment Notesand aTest Planlink. The final transition toReady for Productioncould require aRollback PlanandFinal Sign-offfrom stakeholders.
Key Insight: Don’t overwhelm users with every possible field on a single screen. Presenting only the 3-5 fields relevant to a specific transition significantly improves user adoption and the accuracy of the data you collect. The goal is to make providing correct information the path of least resistance.
Actionable Tips for Success
- Map Fields to Transitions: Before building in Jira, map out your workflow and list which specific fields are essential for each transition. This planning phase is critical.
- Keep Create Screens Minimal: The initial creation screen should be as simple as possible to encourage quick issue logging. For agile teams,
Summary,Description, andEpic Linkmight be all you need initially. - Use Required Fields Strategically: Make fields required on transition screens, not on the issue itself. For example, make a
Code Reviewerfield mandatory only when moving an issue to theCode Reviewstatus. - Provide Field Descriptions: Use Jira's built-in "Field Help" to add descriptions explaining what information is needed for complex or ambiguous fields, guiding the user directly on the screen.
7. Monitor and Optimize Workflow Performance with Metrics
A well-designed Jira workflow is not a "set it and forget it" asset; it's a dynamic system that requires continuous monitoring and refinement. One of the most impactful Jira workflow best practices is to establish a framework for measuring performance using key metrics like cycle time, throughput, and lead time. This data-driven approach transforms your workflow from a simple process map into a powerful engine for identifying bottlenecks, improving predictability, and boosting team efficiency.
Without metrics, workflow improvements are based on guesswork and anecdotes. By tracking how work flows through your system, you can pinpoint exactly where delays occur, understand your team’s actual capacity, and make informed decisions to streamline your delivery pipeline.
How to Implement This Practice
Start by identifying the key metrics that align with your team's goals. Jira offers built-in reports like the Control Chart and Cumulative Flow Diagram, which are excellent starting points. Use these tools to establish a baseline before making any process changes.
- For Engineering Teams: Focus on cycle time to measure the duration from when work begins (
In Progress) to when it's ready for release (Done). A team might track this metric to see if process changes successfully reduced their average code review cycle time from two days to just four hours. - For Support Teams: Monitor the "time in status" for
Waiting for Customer. A high average time could indicate a need for better follow-up processes or clearer initial information gathering to reduce back-and-forth communication and improve responsiveness. - For Product Teams: Measure lead time from idea creation to final release. This holistic view helps identify major bottlenecks across the entire value stream, such as delays in design handoffs or environment provisioning, allowing for targeted process improvements.
Key Insight: Focus on cycle time and throughput over velocity. Velocity measures effort, but cycle time measures speed and efficiency. A team that consistently delivers value with a short, predictable cycle time is often more effective than a team with high but volatile velocity.
Actionable Tips for Success
- Create Team Dashboards: Build a dedicated Jira dashboard for your team that visualizes key workflow metrics. This promotes transparency and empowers the team to self-monitor their performance without waiting for a manager to generate reports.
- Review Metrics in Retrospectives: Make workflow metrics a standing agenda item in your monthly or bi-weekly retrospectives. Use the data to guide discussions about what’s working and what isn’t, turning observations into concrete action items.
- Use Time-in-Status Reports: Leverage Jira’s reporting capabilities to see how long issues linger in each state. If issues consistently pile up in
Code Review, it's a clear signal that this stage is a bottleneck that needs immediate attention. - Correlate with Qualitative Feedback: Numbers only tell part of the story. Always discuss the metrics with your team to understand the context behind them. A spike in cycle time might be due to a holiday week, not a process failure.
8. Design Workflows for Different Project Types and Methodologies
A common mistake is trying to force a single, company-wide workflow onto every team and project. One of the most impactful Jira workflow best practices is to recognize that different methodologies and project types require tailored processes. A rigid, one-size-fits-all approach creates friction, reduces team buy-in, and ultimately leads to inaccurate data as teams create workarounds to fit their actual process.
Designing workflows for specific needs ensures that the tool supports the team, not the other way around. This flexibility increases adoption, improves process efficiency, and provides more meaningful metrics because the workflow accurately reflects the work being done. A development team’s Scrum process is fundamentally different from a DevOps team’s Kanban flow or a support team’s bug-tracking lifecycle.
How to Implement This Practice
Begin by identifying the distinct work patterns within your organization. Instead of creating unlimited variations, aim to establish a few core, standardized workflow templates that teams can adopt based on their project's nature. This provides both structure and flexibility.
- Scrum Development Workflow: A process built around sprints, with clear gates for review and testing. Example:
Backlog→To Do (Sprint)→In Progress→Code Review→In QA→Done. - Kanban Continuous Flow Workflow: A simpler, pull-based system focused on managing work in progress (WIP) and optimizing flow. Example:
To Do→In Progress→Review→Done. - Bug Tracking Workflow: A lifecycle that includes triage, verification, and resolution steps. Example:
New→Triaged→Assigned→In Progress→Resolved→Verified→Closed. - Infrastructure/Ops Workflow: A request-based process with approval gates. Example:
Request→Approved→Provisioning→Complete.
Key Insight: The goal is controlled flexibility, not chaos. Establish 2-3 well-documented, core workflow templates that cover 80% of your teams' needs. This prevents workflow sprawl while still accommodating different operational models.
Actionable Tips for Success
- Create Workflow Templates: In Jira, design and save your core workflows as templates. This makes it easy for project admins to select the right process when creating a new project, reducing setup time and ensuring consistency.
- Document and Guide: For each template, create a Confluence page explaining its purpose, the definition of each status, and which types of teams should use it. Create a simple decision tree to guide teams in their selection.
- Use Workflow Schemes: Associate different issue types within the same project to different workflows using Jira’s workflow schemes. For example, a 'Bug' can follow the bug-tracking workflow while a 'Story' follows the Scrum workflow, all within the same project. To see how this can be managed in complex environments, you can learn more about handling cross-functional workflows.
- Audit and Consolidate: Periodically review the active workflows in your Jira instance. Identify underused or redundant workflows and work with teams to migrate them to one of your standard templates to reduce administrative overhead.
9. Implement Post-Function Actions and Field Updates
Manual updates are a common source of error and inconsistency in any workflow. One of the most powerful Jira workflow best practices is to leverage post-functions, which are automated actions that Jira performs after an issue transition is executed. By automating tasks like updating fields or notifying stakeholders, you reduce manual effort, enforce data integrity, and ensure your process runs smoothly without relying on human memory.
Automating these small but critical actions keeps your data clean and reliable. It ensures that when a transition occurs, all necessary downstream effects are handled consistently, every single time. This frees up your team to focus on the work itself, not the administrative overhead of managing Jira tickets.
How to Implement This Practice
Post-functions are configured directly within the workflow transition settings in Jira. When you edit a transition (e.g., "Start Progress"), you can add, remove, or reorder the post-functions that fire after the transition completes. While complex automations can be built with apps or custom scripts, Jira’s native post-functions cover many common use cases.
- Automatically Set a Resolution Date: When an issue moves to
Done, add the built-in "Update Issue Field" post-function to set theResolution Datefield to the current time. This is essential for accurate cycle time reporting. - Assign to the Lead Reviewer: On the
Move to Code Reviewtransition, you can use a post-function to automatically assign the issue to a specific user, like the team’s tech lead, ensuring a swift handoff. - Trigger External Notifications: Use a post-function to trigger a webhook that sends a message to a Slack channel when a high-priority bug is moved to
In QA, immediately alerting the testing team.
Key Insight: Post-functions are the connective tissue of a smart workflow. They turn a passive status board into an active, automated system that enforces rules and communicates changes, significantly reducing the chance of human error and process gaps.
Actionable Tips for Success
- Start with Built-in Functions: Before reaching for a complex scripting app, explore Jira's native post-functions. They are powerful enough to handle common needs like updating fields, assigning users, and setting resolutions.
- Document Your Automations: In your Confluence workflow documentation, add a section detailing what each post-function does and why it’s there. This prevents confusion when troubleshooting or modifying the workflow later.
- Test in a Sandbox: Always test new or modified post-functions in a staging or test project. An incorrectly configured post-function can cause unintended data changes or even break your workflow.
- Keep Logic Simple: A single transition can have multiple post-functions. Keep each one focused on a single, clear action. If you need complex, multi-step logic, consider using a dedicated automation rule instead.
10. Conduct Workflow Training and Change Management
Even the most perfectly designed workflow will fail if the team doesn't understand how or why to use it. A critical, yet often overlooked, Jira workflow best practice is to implement a structured change management and training plan. Simply launching a new workflow and expecting everyone to adopt it seamlessly is a recipe for confusion, inconsistent data, and frustration. A formal rollout plan ensures buy-in, smooths the transition, and maximizes the value of your process improvements.
Proper change management turns a theoretical process diagram into a living, breathing team habit. It reduces friction, clarifies expectations, and creates a positive feedback loop where users feel heard and supported, leading to higher adoption rates and more reliable data from your Jira instance.
How to Implement This Practice
Introduce workflow changes deliberately, not as a surprise. Your plan should cover communication, training, and support from the initial announcement through post-launch feedback. The goal is to make the transition as easy as possible for every team member.
- For New Hires: Incorporate a 30-minute "Jira Workflow Essentials" session into your onboarding process. This ensures new team members learn the correct process from day one, preventing them from developing bad habits.
- For Existing Teams: When rolling out a new workflow, create a dedicated Slack channel for questions. Host brief, 15-minute daily huddles during the first week to address issues in real-time. Record and share short Loom videos demonstrating key transitions, like moving an issue from
In ProgresstoCode Review.
Key Insight: Don't just show the "what"; explain the "why." When team members understand that a new
Ready for UATstate was added to reduce bug kickbacks from the business team, they are far more likely to embrace the change. Connect every process modification to a tangible team benefit.
Actionable Tips for Success
- Create Visual Aids: Develop simple, one-page "workflow cheat sheets" or diagrams that teams can reference. Visual guides are much easier to digest than lengthy documentation.
- Pilot and Phase the Rollout: Test your new workflow with a small pilot group or a single team first. This allows you to iron out kinks before a full deployment.
- Train Super-Users First: Identify team members who are Jira power users. Train them first and empower them to act as go-to resources for their peers, decentralizing support.
- Establish Feedback Channels: Actively solicit feedback at the 1-week, 1-month, and 3-month marks after a launch. Use this input to make iterative improvements and show the team their voice is valued.
Jira Workflow Best Practices: 10-Point Comparison
| Item | Implementation Complexity 🔄 | Resource & Maintenance ⚡ | Expected Outcomes ⭐ | Ideal Use Cases 📊 | Key Tip 💡 |
|---|---|---|---|---|---|
| Define Clear Workflow States and Transitions | Medium — clear rules, some design effort | Moderate — review quarterly | ⭐⭐⭐⭐ Clear status, improved alignment and bottleneck ID | Cross-functional teams, Kanban/Scrum, ops | Start with 4–6 core states; document entry/exit criteria |
| Implement Role-Based Permissions and Workflow Restrictions | High — role mapping and conditional logic | High — update as roles change | ⭐⭐⭐⭐ Enforced compliance and accountability | Regulated environments, release controls, QA gates | Map roles to permission groups; add escalation paths |
| Use Custom Fields to Enhance Workflow Context | Medium — planning fields and screens | Moderate — audit and deprecate periodically | ⭐⭐⭐ Captures context, improves reporting and handoffs | Complex handoffs, audits, deployments | Require fields only at transitions; limit to 3–5 required |
| Establish Workflow Automation Rules | High — rule logic and testing | Moderate — monitor execution logs | ⭐⭐⭐⭐ Reduces manual work; improves SLA and speed | High-volume processes, notifications, SLA enforcement | Start simple; test rules and monitor logs monthly |
| Implement Status Categories for Cross-Project Consistency | Low — mapping custom statuses to 3 categories | Low — occasional governance checks | ⭐⭐⭐ Standardized reporting and portfolio visibility | Portfolio reporting, executive dashboards, multi-project views | Deliberately map custom statuses to categories |
| Create Workflow Screens and Field Configurations Per Transition | Medium — screen design and visibility rules | Moderate — changes affect all users | ⭐⭐⭐⭐ Better UX, fewer errors, higher data quality | Teams needing concise entry/update flows (dev, QA) | Design by transition; use progressive disclosure |
| Monitor and Optimize Workflow Performance with Metrics | Medium — metrics setup and dashboards | High — continuous analysis and reviews | ⭐⭐⭐⭐ Reveals bottlenecks; enables data-driven improvements | Continuous improvement, DevOps, engineering metrics | Focus on cycle time; review monthly with teams |
| Design Workflows for Different Project Types and Methodologies | High — multiple schemes and templates | High — governance to avoid sprawl | ⭐⭐⭐ Better adoption and alignment with team practices | Organizations with diverse teams (Scrum/Kanban/Infra) | Create 2–3 core templates and use inheritance |
| Implement Post-Function Actions and Field Updates | High — scripting/config and testing | Moderate — monitor for errors/perf impact | ⭐⭐⭐ Ensures data consistency and automation of updates | Workflows needing timestamps, links, integrations | Prefer built-in post-functions; document and test thoroughly |
| Conduct Workflow Training and Change Management | Medium — content and rollout planning | Moderate to High — ongoing education | ⭐⭐⭐⭐ Improves adoption; reduces support requests | Any org deploying new/changed workflows | Pilot, train super-users first, provide quick reference guides |
From Theory to Practice: Activating Your Ideal Workflow
We've explored ten critical Jira workflow best practices, moving from foundational principles like clear states and transitions to advanced tactics like post-function automation and performance monitoring. The central theme connecting all these strategies is a shift in mindset: Jira should not be a passive task tracker but an active, intelligent engine that guides your team’s delivery process. By transforming abstract process diagrams into tangible, automated workflows, you create a system that reinforces quality, enhances clarity, and accelerates productivity.
The journey to an optimized workflow isn’t a one-time project; it's a continuous cycle of implementation, measurement, and refinement. Your initial goal isn't to build the "perfect" workflow overnight. Instead, focus on incremental improvements. Start by tackling the most significant friction point in your current process, whether it's ambiguous handoffs between development and QA or a lack of clear entry criteria for tasks.
Synthesizing Your Action Plan
To translate these concepts into action, remember the core pillars we discussed. Clarity comes from well-defined states, role-based permissions, and consistent status categories. Efficiency is driven by automation rules, smart transitions, and post-function actions that eliminate manual toil. Quality is enforced through specific screen configurations, custom fields that capture necessary context, and the diligent monitoring of workflow metrics to identify and resolve bottlenecks.
The most effective Jira workflows are not just built; they are cultivated. They evolve with your team, adapting to new challenges and incorporating lessons learned from every sprint and release cycle.
Your immediate next steps should be pragmatic and focused:
- Audit Your Current Workflow: Identify one major pain point. Is it tasks getting stuck in a particular status? Are developers missing key information when starting work?
- Select One Best Practice: Choose a single strategy from this article that directly addresses your identified pain point. For example, if information is missing, focus on creating a transition screen with required custom fields.
- Implement and Communicate: Make the change and conduct a small training session with your team. Effective change management is just as crucial as the technical configuration.
- Measure and Iterate: Use Jira’s built-in reports, like the Control Chart, to see if your change had the desired effect. Gather qualitative feedback from your team and plan your next small improvement.
The Power of a Proactive Process
Mastering these Jira workflow best practices delivers benefits that extend far beyond simple organization. It reduces cognitive load for your team, allowing them to focus on high-value work instead of process administration. It creates a predictable, transparent delivery pipeline that stakeholders can trust. Most importantly, it builds a foundation for scalable, high-quality software development, ensuring that as your team grows, your processes become a source of strength, not a bottleneck.
While Jira provides a robust platform, orchestrating intricate processes with nested tasks, conditional logic, and seamless handoffs can stretch its native capabilities. This is particularly true when managing complex activities like customer onboarding, multi-stage QA validation, or detailed release checklists where every sub-task must be tracked and completed in sequence. For teams seeking to automate these complex, multi-layered procedures, a more specialized solution is required to turn an ideal process into a practical, everyday reality.
Ready to elevate your process management beyond Jira's native limits? Discover how Nesty by Harmonize Pro can help you build dynamic, self-managing workflows with nested checklists, automated handoffs, and powerful triggers. Turn your most complex processes into your greatest strengths with Harmonize Pro.
Article created using Outrank